This is an old revision of the document!
Table of Contents
Plan 9 on SDF VPS
Contents
Basics
When your Plan 9 system boots, it will ask you where root is from (via the network, or a local disk). Just hit “[ENTER]” to select local (the default):
root is from (tcp, local)[local!#S/sd00/fossil]:
Next you will be prompted to log in. Log in as the default user, “glenda”:
  user[none]: glenda
  time...
  fossil(#S/sd00/fossil)...version...time...

  init: starting /bin/rc
  #m/mousectl: rc: can't open: unknown device in # filename
  init: rc exit status: rc 24: error

  init: starting /bin/rc
  %
You will now be sitting at a “rc” prompt, Plan 9's shell.
Networking
Configuring Your IP Address
In your control panel at vps.sdf.org, note YOUR_IP (e.g. 192.94.73.x) on the top line.
Start your server, and log in via the console. (default=glenda)
At the “rc” prompt (%), enter:
% ip/ipconfig -g 192.94.73.1 ether /net/ether0 YOUR_IP 255.255.255.0
This configuration lasts until you reboot Plan 9.
Drawterm on Plan 9
Configure your IP address first.
At the “rc” prompt (%), enter these two lines. Replace PASSWORD by the password you want.
% echo 'key proto=p9sk1 dom=plan9 user=glenda !password=PASSWORD' >/mnt/factotum/ctl
% aux/listen1 -t tcp!*!ncpu /bin/cpu -R &
This password lasts until you reboot Plan 9.
Getting started with drawterm
 Now on your local computer download and install drawterm and start it by typing:
./drawterm -a YOUR_IP -c YOUR_IP -u glenda
YOUR_IP must match the IP address described in Networking.
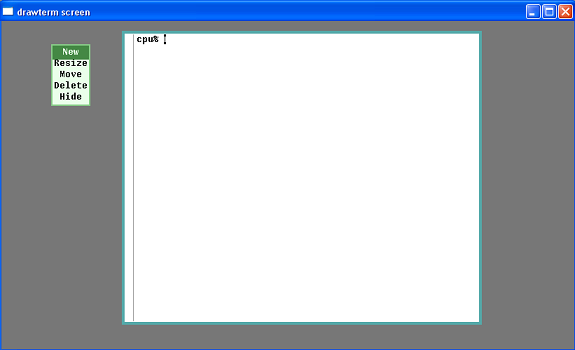
After typing your password, press the right button of your mouse. A menu should appear. Then release the button over New.
Now press again the right button near the up left corner of drawterm and drag the mouse to the lower right before releasing the button, drawing a rectangle.
You should now have a terminal window. The first thing you should probably do is to type “cat readme.rio” (or read it from here)
Adding a User
You may wish to add a user to your system once you get the hang of things. There is really no need to create a new user when you are first starting out. To create a new user you will have to connect to the file server console by typing:
% con -l /srv/fscons
Now at the file server prompt create a new user. Replace USER with what you want your new user to be named:
prompt: uname USER USER
Now you will need to add that user to the “sys” group if you want it to be able to change system configuration files. Again, change USER to what your new user name is:
prompt: uname sys +USER
Now exit the file server console byi typing: “ctrl+\”. You will now be at a “»>” prompt; type “q” to quit.“”